
Laptop Power Supply Circuit Diagram
A large selection of electrical circuit diagrams of power supplies (power adapters, chargers) for laptops. Schematic Diagram. PCB Layout Free Download
| Scheme of a universal 70W power supply for laptops 12-24V, model SCAC2004, board EWAD70W on the LD7552 chip. | Download |
| Power supply circuit 60W 19V 3.42A for laptops, KM60-8M board on the UC3843 chip. | Download |
| Delta ADP-36EH power supply diagram for laptops 12V 3A on the DAP6A and DAS001 chip. | Download |
| Li Shin LSE0202A2090 90W power supply circuit for laptops 20V 4.5A on the NCP1203 and TSM101 chip, AKKM on the L6561. | Download |
| Power supply circuit ADP-30JH 30W for laptops 19V 1.58A on the DAP018B and TL431 chip. | Download |
| Delta ADP-40PH ABW power supply diagram | Download |
| HP Compaq CM-0K065B13-LF 65W power supply diagram for laptops 18.5V 3.5A, model PPP009H-DC359A on UC3842 and LM358 chips. | Download |
| Power supply circuit NB-90B19-AAA 90W for laptops 19V 4.74A on TEA1750. | Download |
| Scheme of the LiteOn PA 1121-04CP power supply on LTA702. | Download |
| Diagram of the Delta ADP-40MH BD A power supply (Part No: S93-0408120-D04) on the DAS01A, DAP008ADR2G chip. | Download |
|
Another version of the Delta ADP-40MH BDA power supply circuit on DAS01A and DAP8A chips. |
Download |
|
LiteOn 19V 4.74A power supply diagram on LTA301P, 103AI, PFC assembled on TDA4863G/FAN7530/L6561D/L6562D. |
Download |
|
Power supply diagram Delta ADP-90SB BB AC:110-240v DC:19V 4.7A on a DAP6A, DSA001 or TSM103A chip. |
Download |
|
Power supply diagram Delta ADP-90FB AC:100-240v DC:19V 4.74A on the L6561D013TR, DAP002TR and DAS01A chip. |
Download |
|
LiteOn PA-1211-1 power supply diagram on LM339N, L6561, UC3845BN, LM358N. Part 1. |
Download |
|
LiteOn PA-1211-1 power supply diagram on LM339N, L6561, UC3845BN, LM358N. Part 2. |
Download |
|
LiteOn PA-1211-1 power supply diagram on LM339N, L6561, UC3845BN, LM358N. Part 3. |
Download |
|
LiteOn PA-1211-1 power supply diagram on LM339N, L6561, UC3845BN, LM358N. Part 4. |
Download |
|
Power supply diagram Li Shin LSE0202A2090 AC:100-240v DC:20V 4.5A 90W on L6561, NCP1203-60 and TSM101 chips. |
Download |
|
Scheme of the universal power supply Gembird NPA-AC1 AC:100-240v DC:15V/16V/18V/19V/19.5V/20V 4.5A 90W on an LD7575 chip and an MDF9N60 field-effect transistor. |
Download |
|
Power supply diagram Delta ADP-60DP AC:100-240v DC:19V 3.16A on the TSM103W (aka M103A) and I6561D chip. |
Download |
|
Power supply diagram Delta ADP-40PH BB AC:100-240v DC:19V 2.1A on a DAP018ADR2G chip and an STP6NK60ZFP field-effect transistor. |
Download |
|
Power supply diagram Asus SADP-65KB B AC:100-240v DC:19V 3.42A on the DAP006 (DAP6A or NCP1200) and DAS001 (TSM103AI) chip. |
Download |
|
Power supply diagram Asus PA-1900-36 AC:100-240v DC:19V 4.74A on the LTA804N and LTA806N chip. |
Download |
|
Power supply diagram Asus ADP-90CD DB AC:100-240v DC:19V 4.74A on a DAP013D chip and a 11N65C3 field device. |
Download |
|
Power supply diagram Asus ADP-90SB BB AC:100-240v DC:19V 4.74A on the DAP006 (aka DAP6A) and DAS001 (aka TSM103AI) chip. |
Download |
|
Power supply diagram LiteOn PA-1900/05 AC:100-240v DC:19V 4.74A on LTA301P and 103AI, PFC transistor 2SK3561, power transistor 2SK3569 |
Download |
|
Power supply diagram LiteOn PA-1121-04 AC:100-240v DC:19V 6.3A on LTA702, transistor PFC 2SK3934, power transistor SPA11N65C3. |
Download |
|
Power supply diagram Delta ADP-90FPB AC:100-240v DC:19V 4.74A on the L6561D013TR, DAP002TR and DAS01A chip. |
Download |
|
Dell power supply diagram p/n: 01XRN1 model DA65NM111-00 AC:220v DC:19.35V 3.34A on the DAP023F and MAX2850 chip. |
Download |
| Power supply diagram AC:90-240v DC:19V 3.42A on the TOP258EN chip. | Download |
|
Power supply diagram Dell PA-12 model HA65NS2-00 AC:220v DC:19.5V 3.34A on FA5528, DS2501 and TSM103A chips. |
Download |
|
Power supply diagram for tablets DSA-0151A-05A AC:200-240v DC:5V 2.4A on transistors K2141 and K2996. |
Download |
|
KS-70WZC1A power supply diagram on LTA201P and TSM103A chips. |
Download |
|
Power supply diagram Dell PA-1900-02D AC:100-240v DC:19.5V 4.62A on L6562 and 103AIW chips. |
Download |
| Laptop Power supply Adaptor circuit 12V | Download |
| 65W LAPTOP POWER ADAPTER CIRCUIT DIAGRAM | Download |
If you have diagrams that you are ready to share, send them to [email protected]
If you haven't found what you're looking for, write in the comments below.
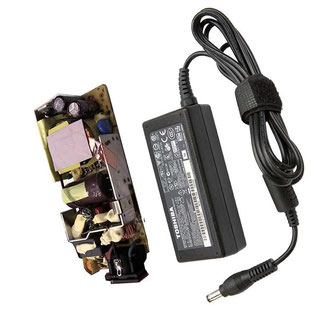
How to disassemble a glued power supply
The adhesive layer can be dissolved or cut. The first method gives a more accurate result, the second is more effective, faster and does not require certain precautions.
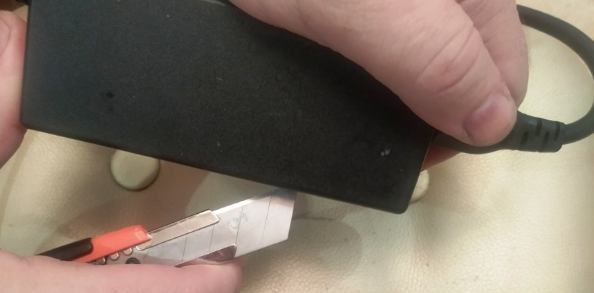
The first method using force
For the force method, you will need a sharp tool. A stationery knife, etc. will do. To open the glued body, you need to cut the seam. To do this, you will have to walk along the joint several times until you reach a through slot, or at least to such an extent that the shell halves can be separated by hand with a little effort.
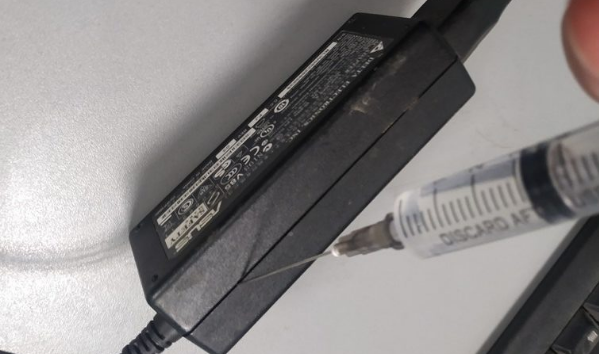
Second method using solvent
The second method is less traumatic, but its effectiveness is lower, and the chances of success are not guaranteed. To open the adapter shell, you will need a solvent that can deal not so much with the glue, but with the plastic from which the case is made. The essence of the method is that you need to soften the plastic in the thinnest place - it passes through the junction of the shell halves. The solvent must be applied strictly along the seam so as not to damage the rest of the surface of the body. A syringe works well for this.
After applying the solvent evenly along the entire joint line, wait a while, then separate both covers. If the solvent is selected successfully, the process will be successful. If you cannot separate it by hand, you can try trimming the softened seam with a sharp tool. The problem is finding the right solvent that will soften the plastic before it evaporates.
The third method using gasoline
If the appearance of the case cannot be damaged or the solvent turns out to be ineffective, you can try using gasoline. It won't dissolve the plastic, but it can soften hardened glue. It can also be applied using a syringe. You may need to make several passes
Inspection of the board and sealing of the block
If everything worked out correctly, access to the power supply board will open. If you're lucky, it will be repairable.
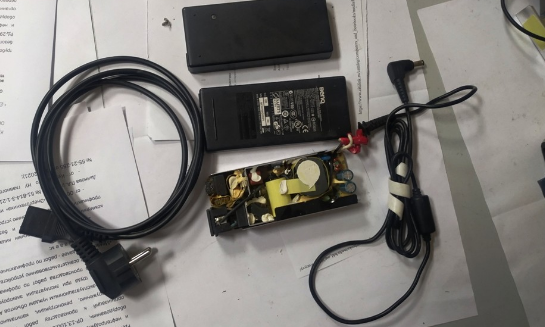
The worst option is if the board is filled with a polymer compound. There is no access to the received parts; it is also impossible to determine the elemental basis for searching for a diagram. If there is no other result than repairing the power supply, the compound can be removed by mechanical or chemical means (a similar solvent).
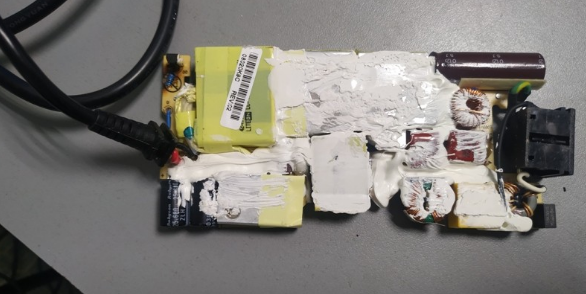
After gaining access to the board, a visual inspection must be carried out. Based on its results, it is possible to identify burnt components that must be unconditionally replaced, burnt out board tracks that need to be restored. The problem is that the burnt element is not always the culprit of the malfunction. Often it is only a consequence of the failure of another component that has not changed its appearance.
Muhammad Bilal Qureshi (Sunday, 05 July 2026 21:32)
I have power supply of liteon 20v and itc 16 pin ic is burnt so i need ic number .
So readable numbers are
Start with T and ends on 31
On 16 pin ic
So can you give me the ic number
Gmail: [email protected]
marian (Wednesday, 20 August 2025 22:51)
multumesc pentru ajutor
Priti cha (Sunday, 08 June 2025 13:15)
I need pdf
valter collevecchio (Wednesday, 06 November 2024 09:28)
schema hp power supply pa-1900-15c2 serie ppp014l
Ko sai azw htet (Sunday, 23 June 2024 17:41)
Fujitsu 19v 4.22 v circuit diragran
Boumaraf Chekhab (Monday, 26 February 2024 10:31)
adapter Toshiba 19v 3.34a